
What we’re building
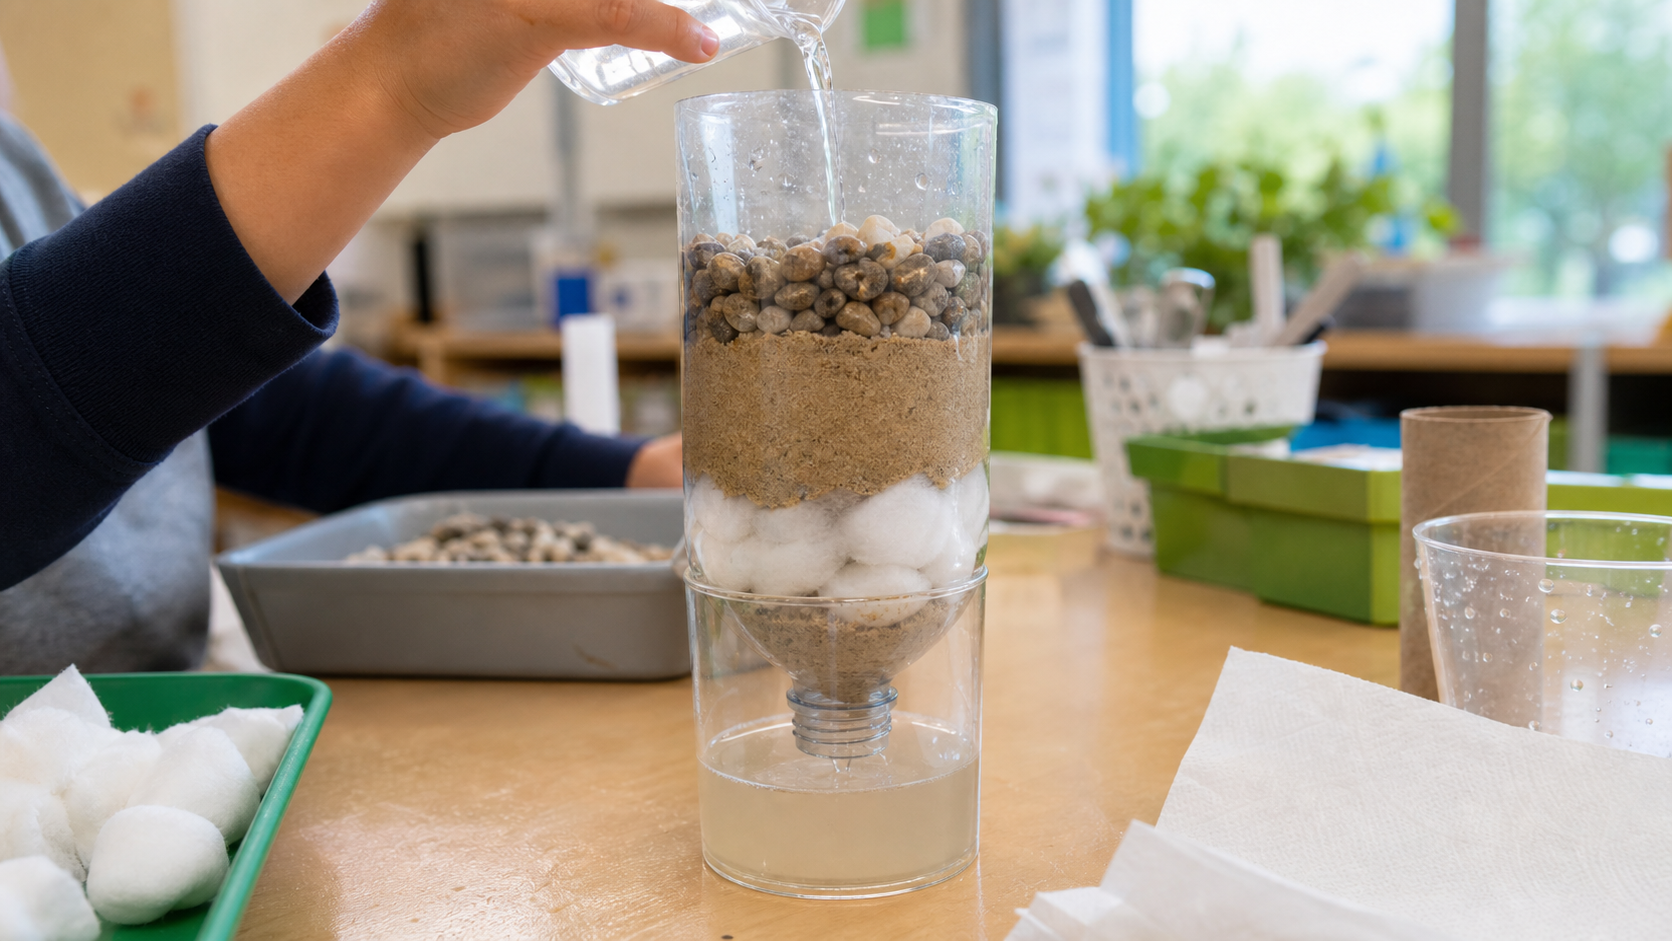
We’re building a layered bottle filter that catches some of the dirt in cloudy model water. It can make water look clearer, but it is absolutely not a drinking-water machine
Concepts
- Filtration: separating visible particles from water
- Particle size: big pieces are easier to catch than tiny pieces
- Flow rate: how quickly water travels through the layers
- Water safety: clear-looking water can still contain invisible germs or chemicals
Materials
- A plastic bottle, coffee filter or cotton balls, and a cup
- Gravel and clean sand
- Model dirty water: water mixed with soil or cocoa powder
- Scissors, a measuring cup, and a timer
The build
Let’s make the science happen
Take your time with each step, notice the weird little details, and remember: a wonky first try is just a build asking for its next idea
Step 1
Mix the model dirty water
Pour water into a pitcher and stir in a small spoonful of soil or cocoa powder until it looks cloudy. This is model dirty water for an experiment, never a drink. Make one batch for everyone so the filters get the same kind of challenge. Label the pitcher ‘DO NOT DRINK’ like a serious scientist with a very serious label maker
Make one safe test batch Step 2
Turn the bottle into a funnel
Ask an adult to cut the bottom off a plastic bottle. Turn the top part upside down over a clear cup. Push a coffee filter or 3–4 cotton balls into the neck so sand cannot escape. Check that the bottle is steady; a wobbly filter makes a spectacular mess, not great data
Build a safe filter holder Step 3
Plan your layers
On paper, draw your filter from top to bottom. Try gravel near the top to catch large chunks and sand below it to trap smaller particles. Add the real layers one scoop at a time, gently tapping the bottle so they settle. Leave 3 cm of empty space at the top for pouring
Sketch before pouring Step 4
Run the first timed test
Measure the same amount of model dirty water for every filter, try 100 mL. Start a timer as you pour slowly into the top. Watch the color of the drips and the time until most water has collected. Do not stir or poke the layers while testing; give your filter a fair chance to do its job
Measure, do not guess Step 5
Compare the evidence
Place the original cloudy water and every filtered sample on white paper in the same light. Compare their color and any bits floating inside. Talk about where you think the largest pieces got caught and where the water slowed down. Use words like ‘clearer,’ not ‘clean,’ because clear water can still be unsafe
Line up the cups Step 6
Redesign one layer
Choose one change: add a deeper sand layer, swap the gravel and sand order, or add a second cotton layer. Keep the same water amount and timer. Run the test again and write what changed. The goal is not to make magic drinking water; it is to discover how a filter’s structure changes what you can see
Make a second version
Conclusion
What did your build teach you?
You learned how layers can catch different sizes of particles and how design changes can affect flow. You also learned a very important science truth: clearer is not the same as safe. That is smart environmental engineering
When it gets weird
If water rushes through cloudy, look for a gap or a very thin sand layer. If it barely drips, loosen the cotton or sand a little. And once more for the lab safety chorus: even clear filtered water is never for tasting